About Me

My photo
Atlanta, Georgia, United States
Welcome to my little corner of cardmaking,creations,creative urges, special thoughts from my heart for your inspirations.

Thursday, January 5, 2017

NOTE CARD GIFT PACK

 
Note Pack Instructions.
As you design your gift pack you will see I have included
more mat sizes than you choose to use.
Creations are Endless
 
 C/S for folder 9 1/4 x 5 1/2
score 4 1//4/ x 5
Front mats  4 x 5 1/4
       3 1/2 x 4 3/4
Ribbon any size  x about 24"
Left inside mat if desired  4x 5 1/4
Envelope band  2 x 11 1/2
Score  2 1/2 and 3   and 8 and 8 1/2
Envelopes use punch board
Paper  6 3/4" square   score at 3"
Inside right side mat opt.  4 x 5 1/4
BOX   3 x 8 7/8    score 3 5/8 - 4 1/8 - 7 3/4 - 8 1/4
turn and score short side at 1/2 "
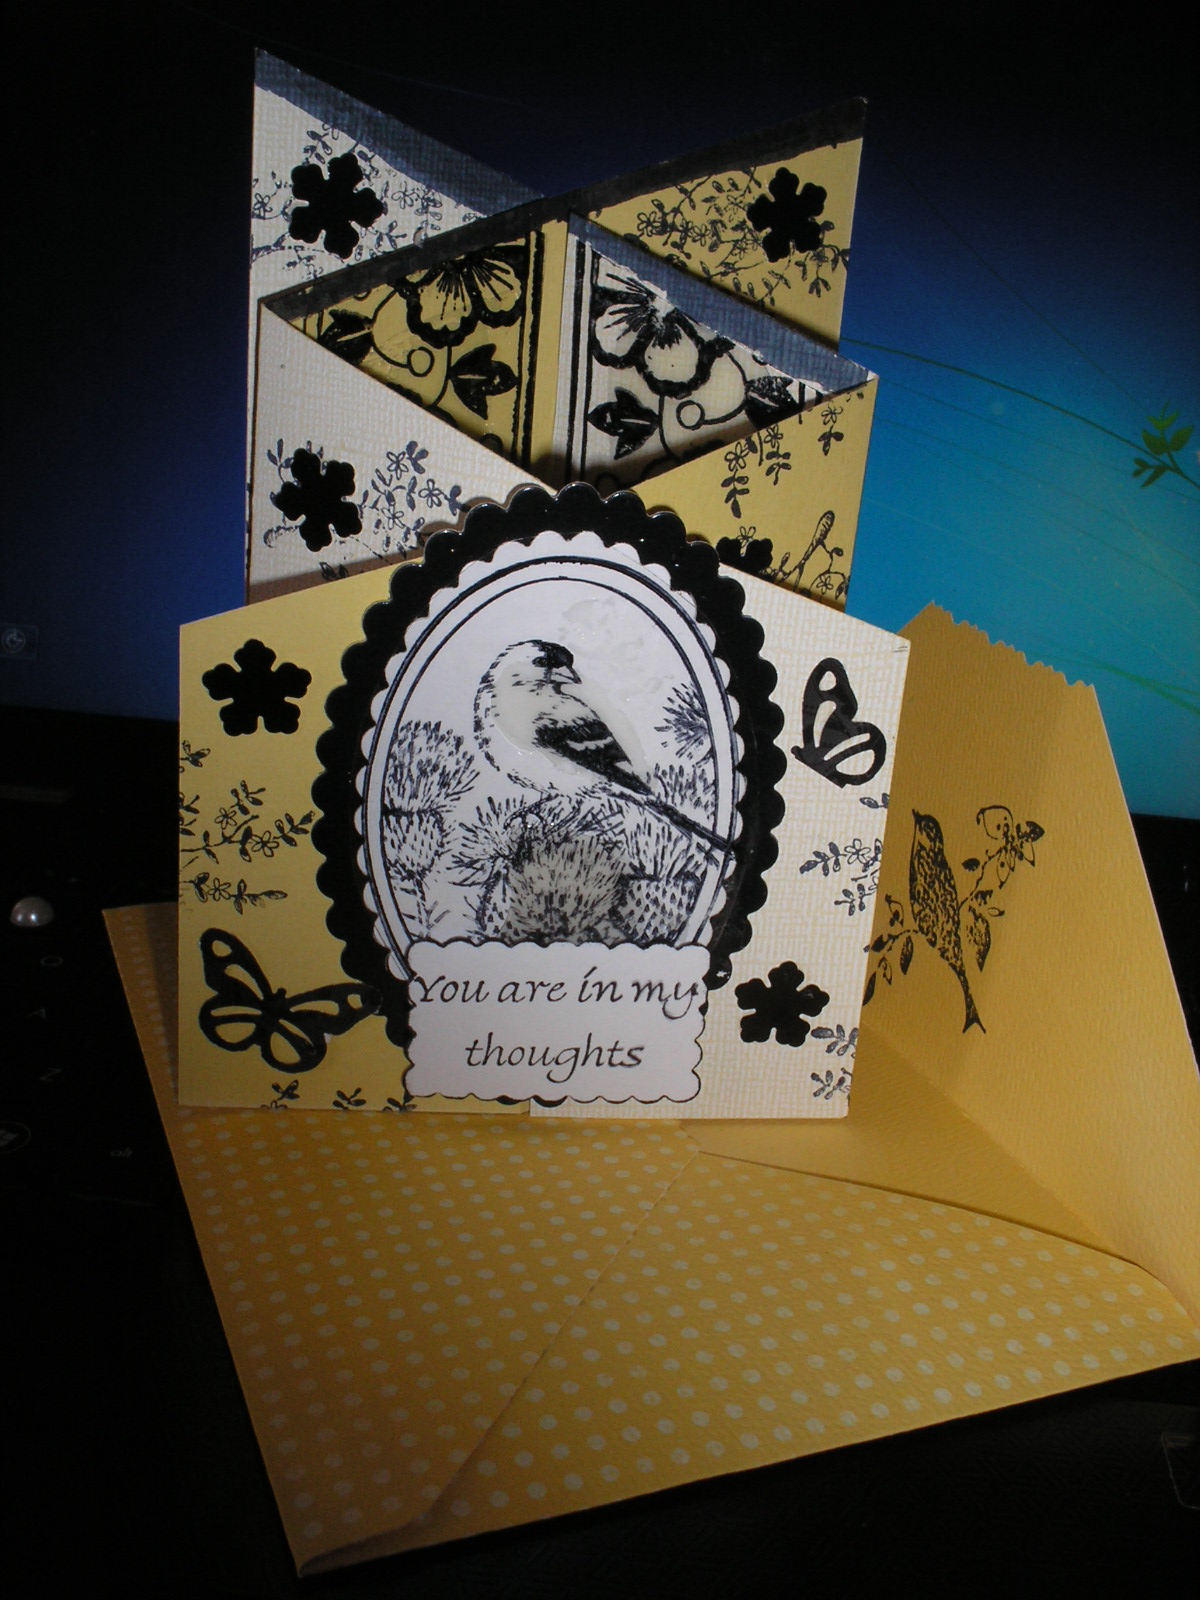
Greeting card:  4 1/4 x 7  score at 3/1/2
You now have a 3 1/2 x 4 1/4 " card. Make 6
Optional mat for card  3 1/4 x 4".
 
Your  contrasting envelopes should fit into a A-2
envelope for mailing.
Recommending a heavy c/s for the folder.
I HOPE YOU ENJOY THIS SWEET GIFT.


Friday, October 28, 2016

Sweet Tweet Little Boxed Notes and Envelopes


Make another small gift remembrance
Design and create four Tweets along
with envelopes .
Tweets are 3 x3   Cut cardstock 3x6
and score at 3.
Make matching envelopes on punch board
for 31/4 " square envelope.
You can leave notes blank or stamp small
sentiments on inside.


Thursday, October 27, 2016

Calendar side view. Scroll down.


Calendar Cards 2017

Calendar Card
 Directions
Sturdy c/s  one piece 4x12
Score on long side at 5-7 1/2 + 10
Cut out or design your image to fit the front panel
cut panel paper if you want to 1/4" smaller than
your 4x5 main card.
You may use photos and cut to size.
When  your card is finishes the 2  short edges get
glued together. That's the 2 back sides. Do not use
double sided tape. It doesn't seem to hold well.
Calendars from Taylored  Espressions on PINTEREST.
Supplies:  Tombow glue and markers
Ultra thick clear embossing powder

Stamp is Altenew

HAVE FUN IDEAS ARE ENDLESS


Thursday, February 11, 2016

Cascade Yellow and Envelope

 
This little cascade was designed  and created by Doris Adams
I can only claim credit for decoration of the card.
PLEASE ENJOY
This pattern is by far the
simplest and neatest.
The envelope was created on the envelope board


Wednesday, February 10, 2016

Concertina Fold Cascading Card


This little cascade was designed  and created by Doris Adams
I can only claim credit for decoration of the card.
PLEASE ENJOY
This pattern is by far the
simplest and neatest.


Wednesday, July 9, 2014

Inchie Box Card or Tag


Just want to say a quick HI ?  Do it with this little one inch square box 
or use this as a package  trim. or a card.

Card stock 2 1/2 x 4 1/4
Score long side at 1" across
Score short side 1-2-3-4
Insert: Cut 1, 1" x 1 1/2"
Score in 1/4" on each end.

Stamp with 1' clear I & O clear inchies on acetate
and cut out the inch squares.
Loving heart stays young - clear stamp.
Cut out and place randomly
Border around bottom is MS
Make a vellum rose with a pearl.
Will fit in a 3 x 3" envelope.
This is just a basic guide of how I did the
box. U-tube has beginner instructions.

Tuesday, July 8, 2014

Halloween Gatherings

POP UP BOX CARD
" HALLOWEEN GATHERINGS'

Box is 2 1/2 " square
Cut basic c.s  5 x 10 1/2"
Score at 2 1/2 - 5 -7 1/2 - 10 - and 10 1/2 long side.
   Turn short side and score across at 2 1/2
Follow U-tube iinstructions and use your random stamps
and die cuts. Have fun.


Saturday, June 14, 2014

Box Card Packed With Love


Foldable card for mailing. So many little elements we love to look at
fill this little box for special enjoyment. Great for many occasions.
Base c/s  10 1/2 x 5"
Score short side 2 1/2,  5,  7 1/2.,  10 and 10 1/2 "
Score long side at 2 1/2 "" 
Inside braces  ( 2 ) are cut 3 1/2 " score 1/2 " on each side of tab.
Cut out the upper 1/2 ' tab. The bottom tab is taped down to the first
2 1/2 " sq. to form the box.
Designers use different sizes for their boxes. I like this size as it stands
better than a real tall one, also gives more options of elements to fill your 
box filled with pretties.

U-tube many videos

Tuesday, June 10, 2014

Blue Fairies, Flower Box

                                                      Closed Image

I This Graphic 45 box was made 2 1/2" square.
also used heavy C/S . Vellum flowers were dry embossed, and stamped
in white with a small background flower stamp to give them character.
Petals are 6 layers. Slots were filled in with random stamps. Just use
what you have. 
ENJOY


Sunday, June 8, 2014

Yellow Pot of Flowers


Cheery little box of flowers for a Happy Birthday. The decorations are endless. Stamp, cut out, punch, just use your imagination and let it go wild like some of our flower beds do.


Friday, June 6, 2014

Bridal Shower Cards


Need a couple of elegant  cards but not so
time consuming ?  I looked in my little pile of unused items previously made and didn't use. Came up with more than enough to complete the cards. Vellum flowers are punched, stacked 6 high and the tips cut with Deckle scissors


Inside sentiment:  Wishing you both a beautiful forever together.


A-2 Wedding shower card. Elements came from my unused left overs. Quick and easy.


Thursday, May 22, 2014

Diamond Triangle Explosion Card


Diamond Triangle Explosion Card
Old version of diamond exploding card. Instead of the center popping
out it is adhered to base card.
Outside base 5 x 10 ".  Score at 2 1/2" and 71/2"  mark ctr.at 5".

Inner card score same and also score from the center mark at 5"
diagonally to the bottom left and right outer corners. Then score
the same from the bottom ctr. to R. and L. top outside corners.

The diamond center focal point is a 31/4" square. The triangle patches
are the 31/4" sq. cut in fourths.
Mix and match paper as you please and when you need more 
matching, just make your own. I stamped butterflies and some
foliage on peach paper to go with the Graphic 45 Primrose Cottage
.
FORGOT:  After adhering center to base card, also tape outside
edges top to bottom to base card. Tape makes a smoother seam
than glue. The patches can be glued  after the base and inner card
 have bee joined together.
 Make a band for your card any width by 12" and decorate to match
your theme.

Any questions E-mail me.

Monday, May 19, 2014

Blue Daisy Pop Out

This A-2 card was by cutting out the three pop outs by cutting individually with one die.
Card was scored at 2 1/8 and 4 1/4. Fold the front cover back on the first score line.
Lay your die in the middle on that 2 1/8 score line and cut three times. Place your cutting plate
only on the half of the die you want cut and it will not cut thru the other half.
/////////////////////The die is a Spellbinder label. Flowers on the inside are just punched 
and layered.after all I never make two alike. Just fantasies.


Sunday, May 18, 2014

Wild Orange Stackable Flowers


Any punch outs about the same size are layered to make
these fantasy flowers. The card is 5 1/2 x 6 3/8 , score
at 2 1/8 for the front flap. Cuttlebug the flap. Decorate 
the inside with your sentiment and contrasting paper.

Saturday, April 26, 2014

Daisy A Day Pop Up Box

Pretty little foldable gift card boxes. Great for using up scrap papers and embellishments you have leftovers.
Try decorating a matching notebook for an adorable gift.
On the picture below I have included the link on U tube for actual making    however I will say that I
cut my box size 5" x 8 1/2 '
Turn to the R. score top to bottom at 2"
Follow the tutorial as how to assemble
Embellishments are endless, pre made, punch outs,
Spellbinders, stamps and endless ideas.
dorisadams1220@gmail.com
Enjoy Making

Thursday, April 24, 2014

Flower Box Pansies

                                                 This card made and designed by; Doris Adams


        Graphic 45 paper used for this box of pansies
        The card is foldable and goes into a 5" envelope.
          Main flowers created with Stampin up pansy punch
and Flower  Shop  pansy stamp group
           Link below is a great tutorial for making a pop out box.
         .https://www.youtube.com/watch?v=R-DdtZfohyc

Sunday, March 16, 2014

Flowers for Mother

A 6 x 6 square card.


The center focal point is a smaller version of the tutorial for


fancy folded cards. ( Scroll down ). The rest is easy to look at


and follow. It will take a lot of patience with the punches and


punching all around the page but practice and learning your


punches will come easier with time.

Monday, December 16, 2013

Sample Victorian Ornaments


SCROLL DOWN TO FULL TREE IMAGE
I ENJOYED MAKING

\
Posted by Picasa

2013 Mini Victorian Table Top Tree


\I have limited space this year.
Ornaments all handmade and many made with Spellbinder dies.
Under the tree is many of my Vintage collectable oil lamps.
Vintage is coming back!!!
Posted by Picasa

Tuesday, September 24, 2013

Bird on Holly Berry


The instructions are below one post.
This bird stamp is Great Impressions
Posted by Picasa

Cardinal on Pine


This is a 5 x 6 1/2 card.
Layer your mats as desired but the center mat needs to be 4 3.4 x 3 1.4. You may
put any Cuttlebug embossment you desire on the white mats.
Bird stamp is Rubber Stampede stamped with Versamark and Gold embossing glitter.
MS punch for birds and sprigs. Small petal punch used for red flowers and a stack
of three in each set. Merry Christmas is a Penny Black stamp. Spellbinder's die cuts
used for the bauble. Use 2 sizes of your choice. Fancy Tags 2 used and cut out the
elements you want to decorate your bauble. I stamped around the outside border of
the bauble with peg stamp decor, embossed in gold. Optional but adds a little more
bling. The bird was stamped separately, embossed in the gold glitter, cut out oval to
fit in the Tag 2. Oh yes cut the Tag 2 in 1/2 diagonally.
Hope this helps have fun!!!
Posted by Picasa

Wednesday, September 4, 2013

Display Board for Spellbinders


Found on Pinterest.
I have found a great way to display my dies. Actually made my oun before seeing this board on Pinterest.
I cut my plywood board  30" x 48", painted it white and used thin 1 1/2" white nails that I set at a angle.
I only hung up the most popular dies and didn't put them on a separate round ring as above. Taking them off the ring everytime and putting them back, to me is a pain in the neck. My board sits on the floor and can be moved with ease. See what you can create!!!  Doris
Posted by Picasa

Friday, August 16, 2013

A Beautiful Forever


 A-2 card
Background is Cuttlebug " Damask"
Gold flourishes are dies by Cherry Lynn
Vellum flowers are made with a 5 petal punch
Inside sentiment
Wishing you Both a Beautiful Forever
Posted by Picasa

Monday, August 12, 2013

Simply A Butterfly


A 4 1/2 square card.  Using Spellbinder dies, Cherry Lynn dies and a Martha S. Punch.
Center of vellum, cut out with Spellbinder med, Nested Butterfly, Added a patterned butterfly with the same die. Topped that with a exotic butterfly from Cherry Lynn and a baby butterfly with Martha's punch.
Posted by Picasa

Strawberry Delight

 
Posted by Picasa

Friday, August 9, 2013

Butterfly Cut Out


A Spellbinder cut out and so  versitile for so many occasions.
The black butterfly was stamped on acetate with Stazon and cut out.
Posted by Picasa

Friday, July 12, 2013

Climbing Roses


A-2 card using I&O Climbing Roses stamp. Colored with water color markers.
Apply a butterfly of choice stamped on acetate with Stazon. I embossed the center
image with Ultra Thick E/P for a special effect.
Posted by Picasa